Quickstart
This quickstart will guide you through the installation steps that should lead to your Fluksometer’s [FLM] successful deployment. Please consult the troubleshooting chapter if you experience any installation difficulties.
Caution
Please consult a qualified electrician if you are unsure about any step in the installation process.
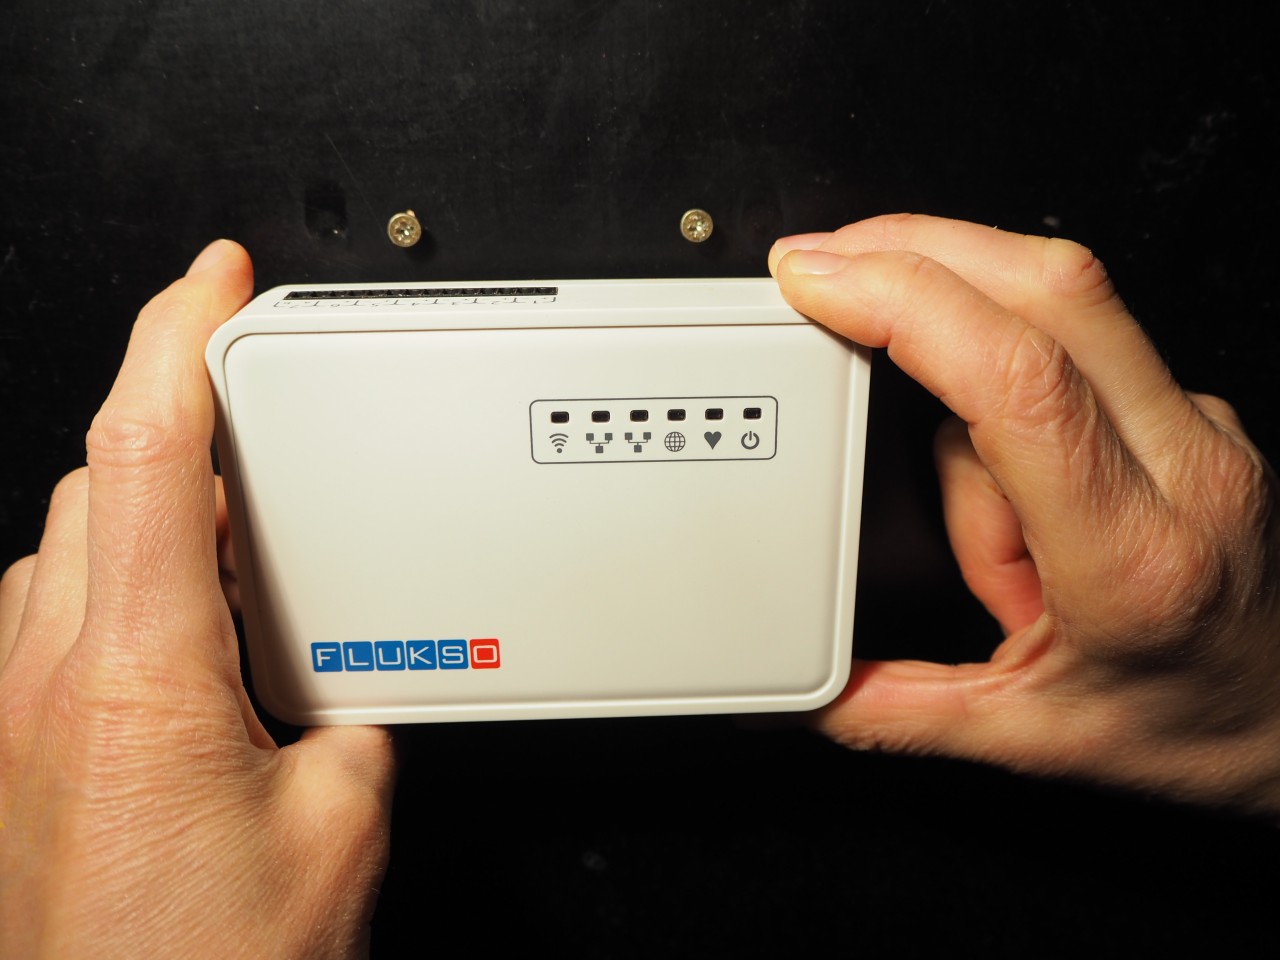
step 1: secure the Fluksometer
Find a suitable location near the fuse box to install the FLM. Use the rear mounting holes to fix the Fluksometer to the wall. The cardboard inside the Fluksometer packaging will double as a drill template. Alternatively, strap the FLM with a plastic cable tie.
step 2: attach the current clamps
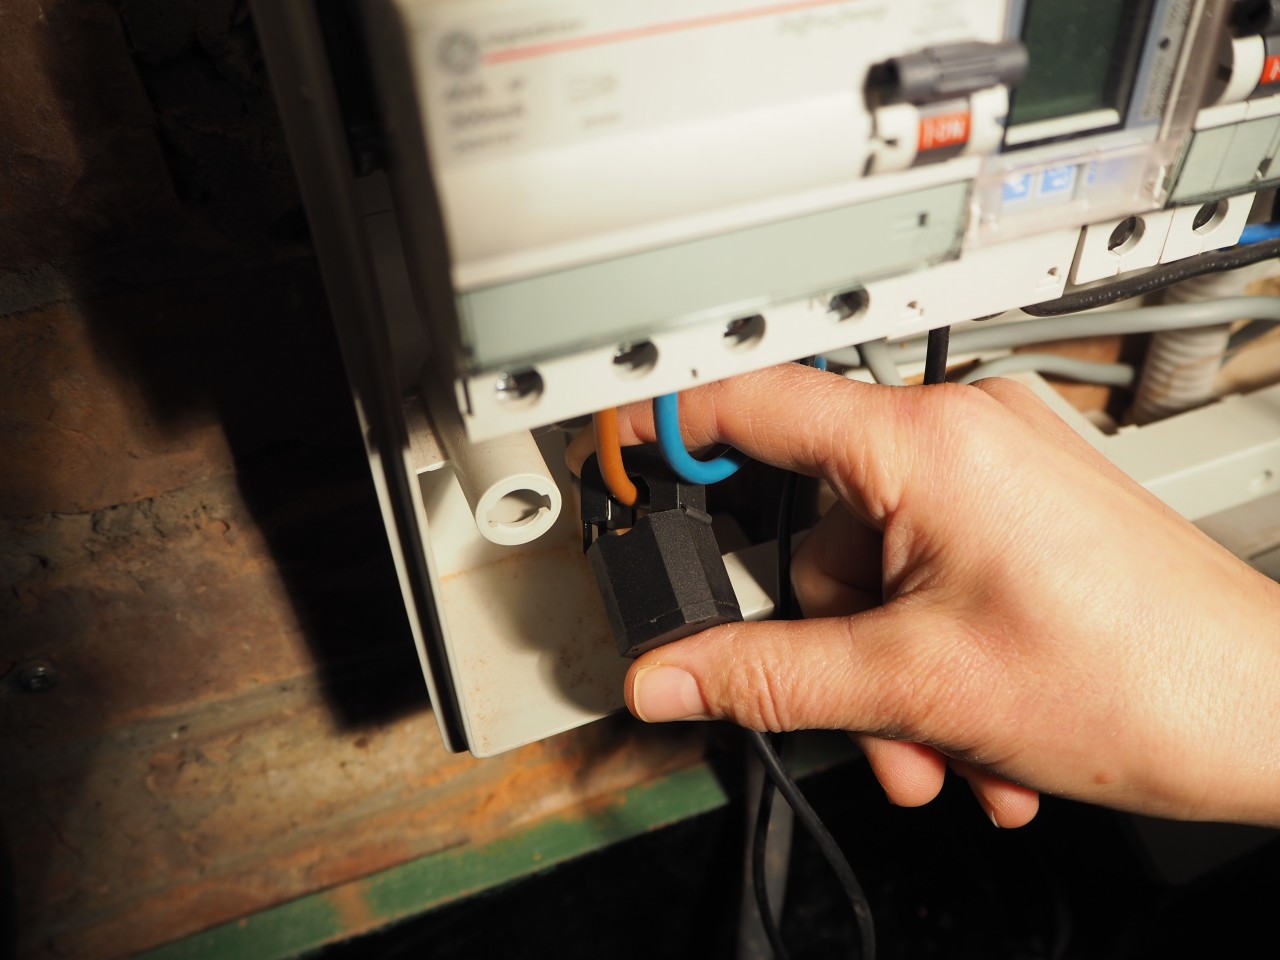
For safety reasons, switch off the main electricity supply. Within the fuse box, attach a current clamp to each of the live, non-neutral wires running from the electricity meter. Close the clamp firmly. You should hear a slight click. The lip should lie flush with the clamp’s body. In the case of a 3-phase system, make sure all clamps close in the same direction.
single-phase electrical system
three-phase electrical system
Caution
The live wire should be fully insulated. Never attach the clamp to a non-insulated live wire!
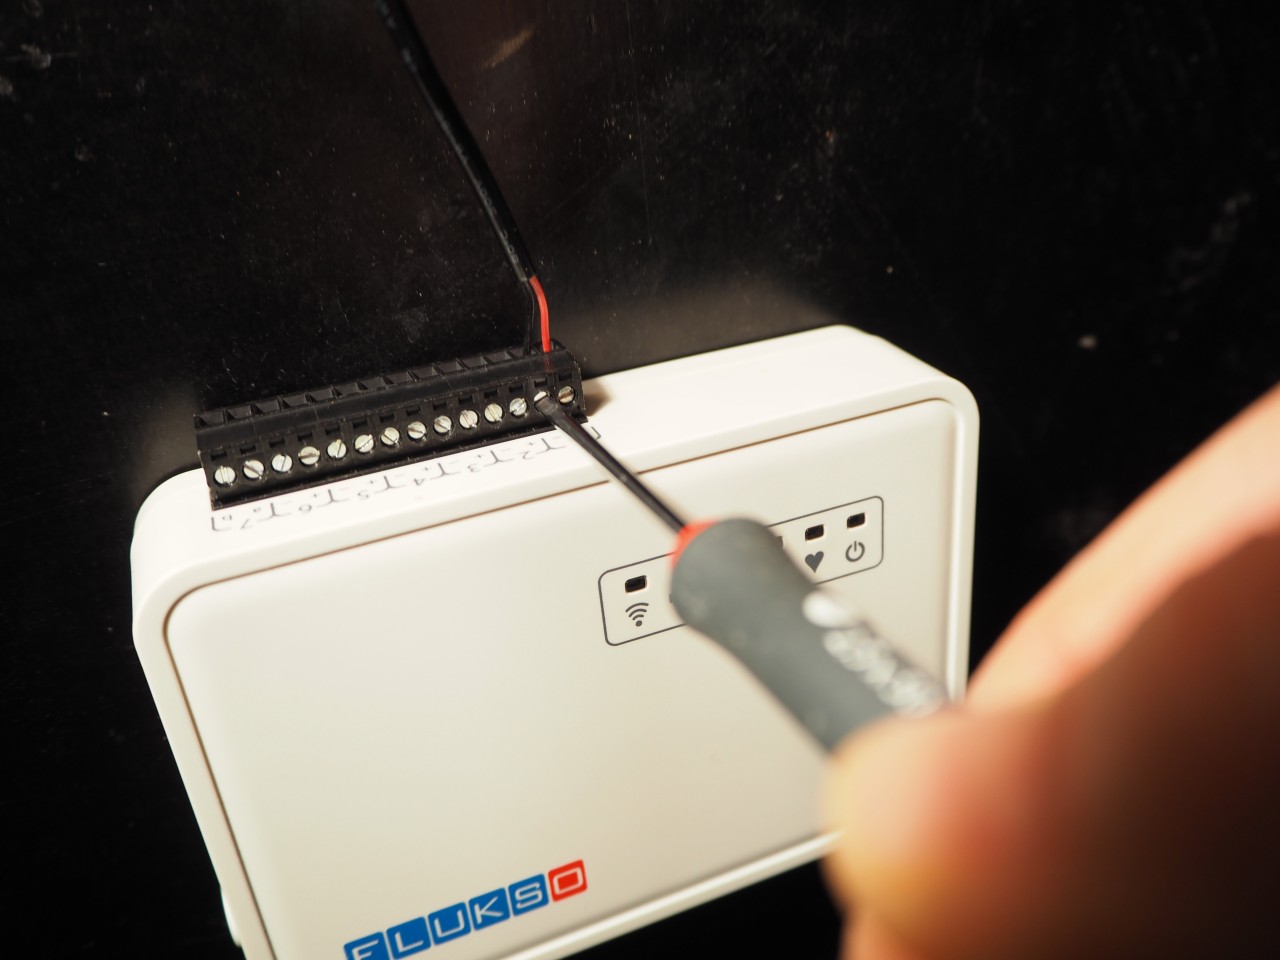
step 3: connect the clamps’ cable
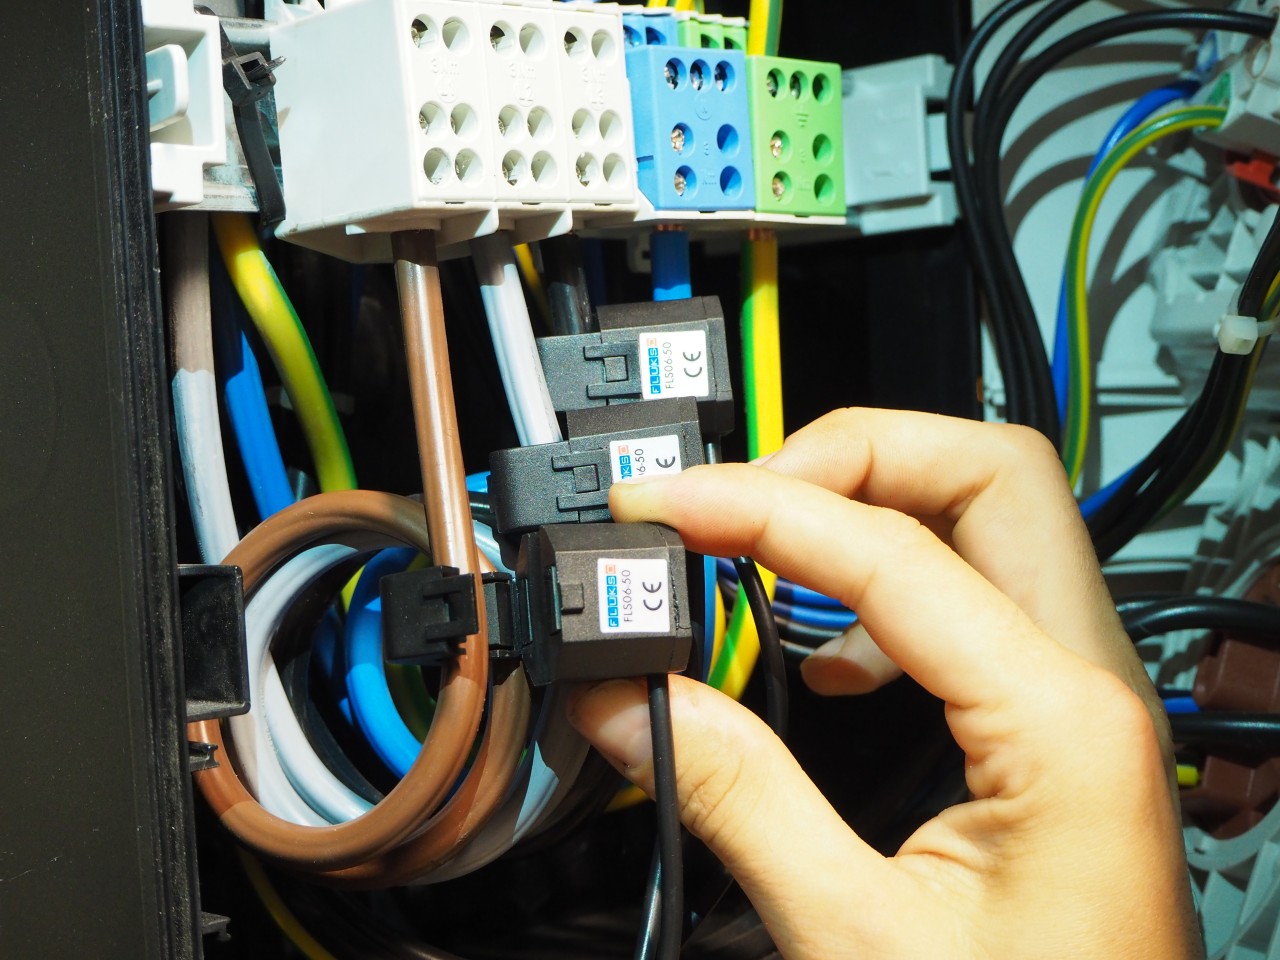
Connect the cable from each of the current clamps to one of the FLM’s current clamp ports (ports 1,2 or 3). Take care of connecting the black and red cable: red to ‘+’, black to ‘-‘.
step 4: configure wifi & ports
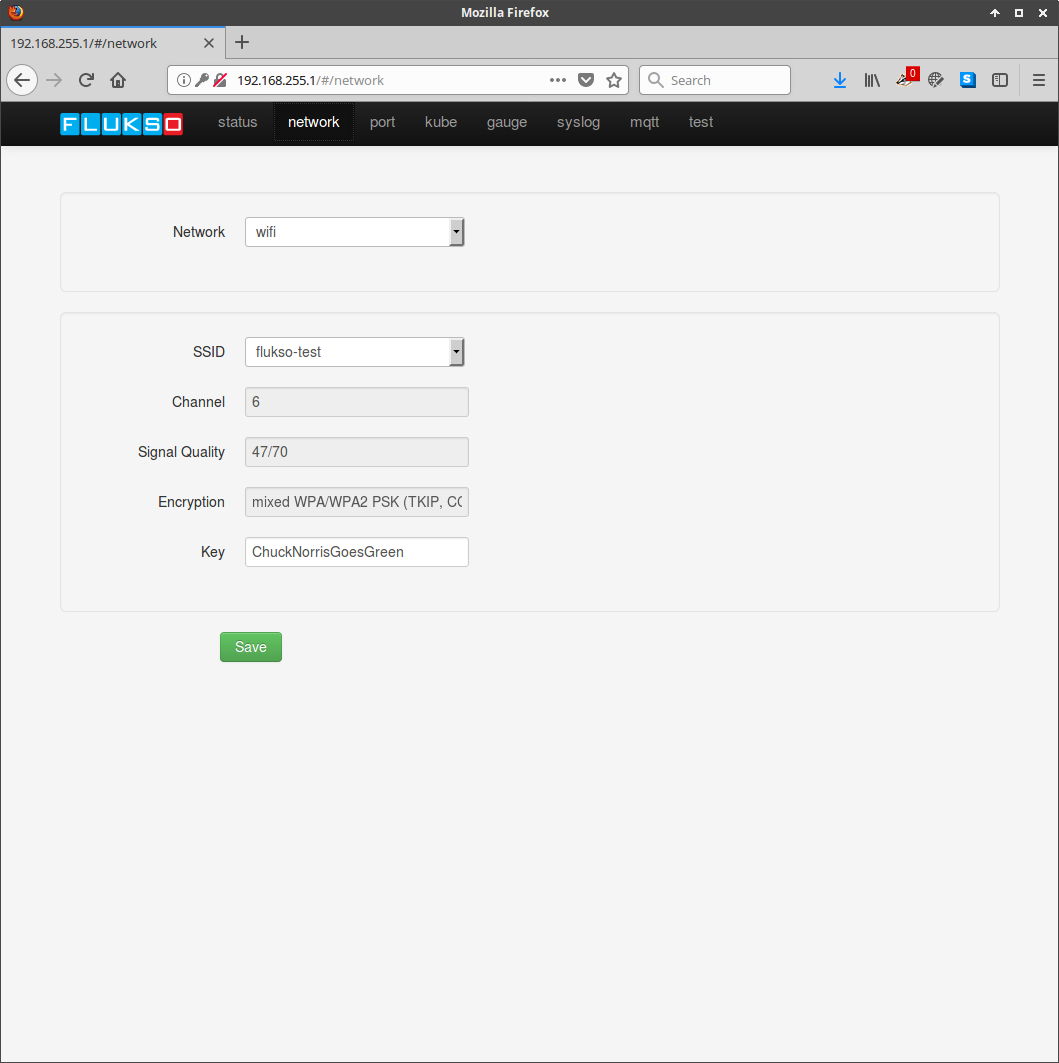
Switch the main electricity supply back on. Power up your FLM by connecting the power plug. Wait until a heartbeat is present on the heartbeat LED. Connect your computer to the FLM’s LAN ethernet port. Surf to http://192.168.255.1. Sign in using the default user/password settings. On the network tab, select the proper wireless network and fill in the corresponding security key. The globe LED should light up within one minute.
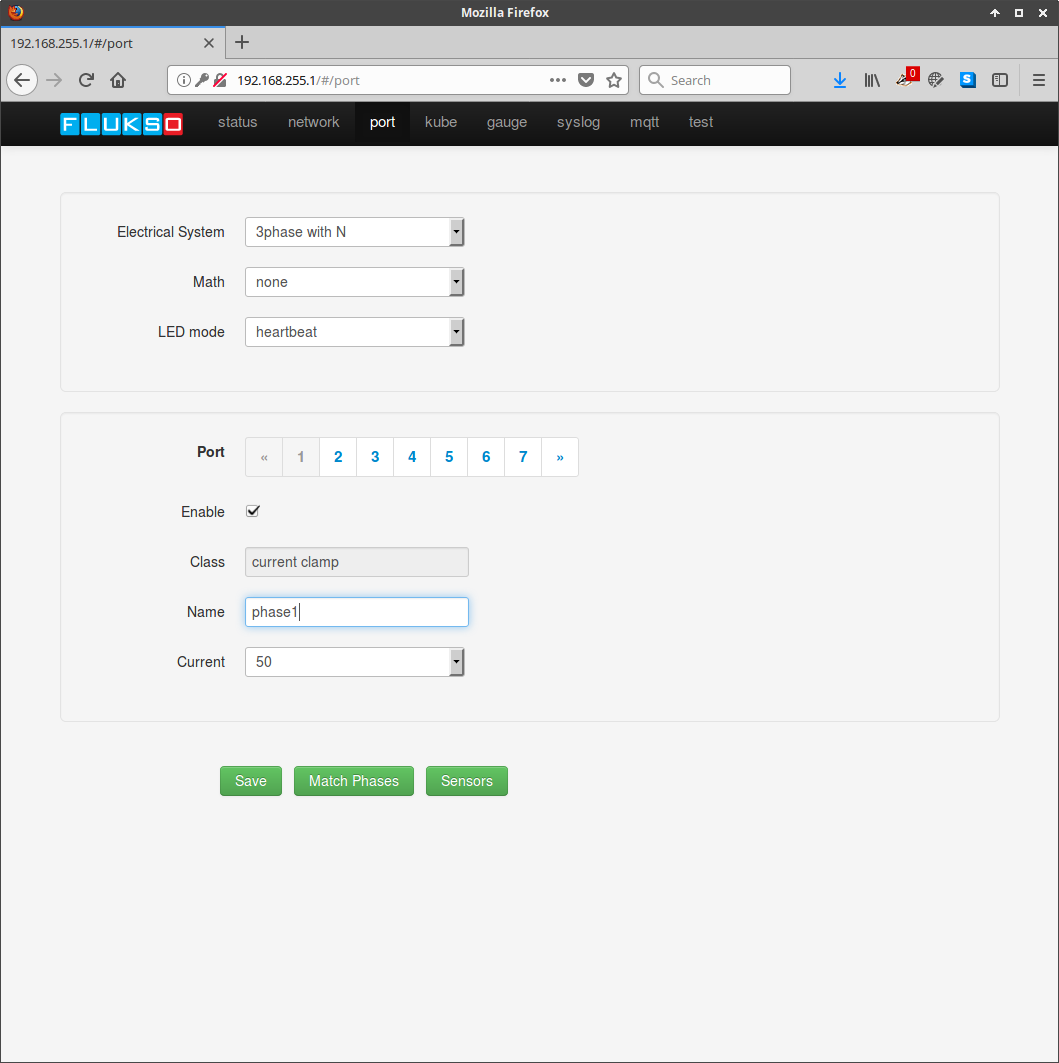
Proceed to the port page and configure each of the ports you wish to use on the FLM. For a proper configuration, make sure to set the correct electrical system, i.e. single-phase or 3-phase with(out) neutral. Press the ‘save’ button. If applicable, temporarily disable your PV-panels. Turn on a sufficiently large electrical load. Now press the ‘match phases’ button.
step 5: configure flukso.net
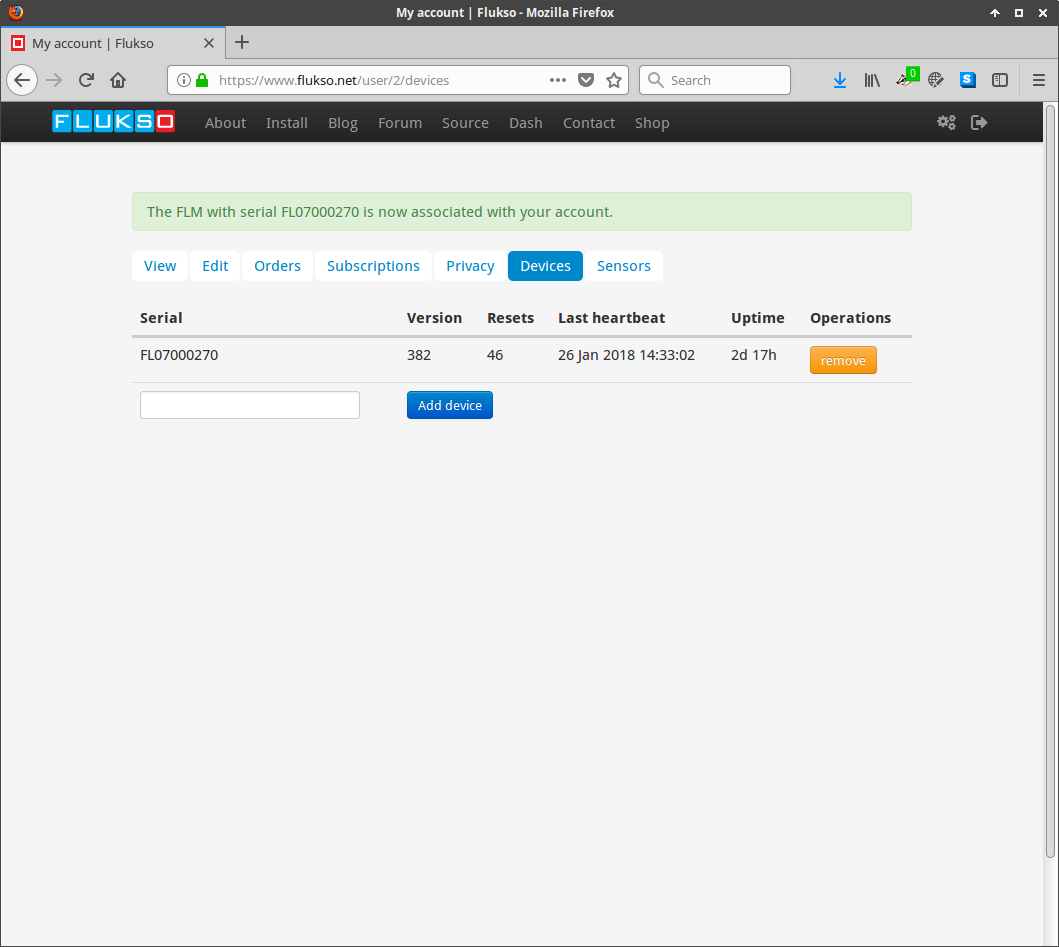
Visit https://www.flukso.net/user/register to create an account. Then click the cogwheels [top right] -> devices tab to associate the Fuksometer’s serial number with your account.
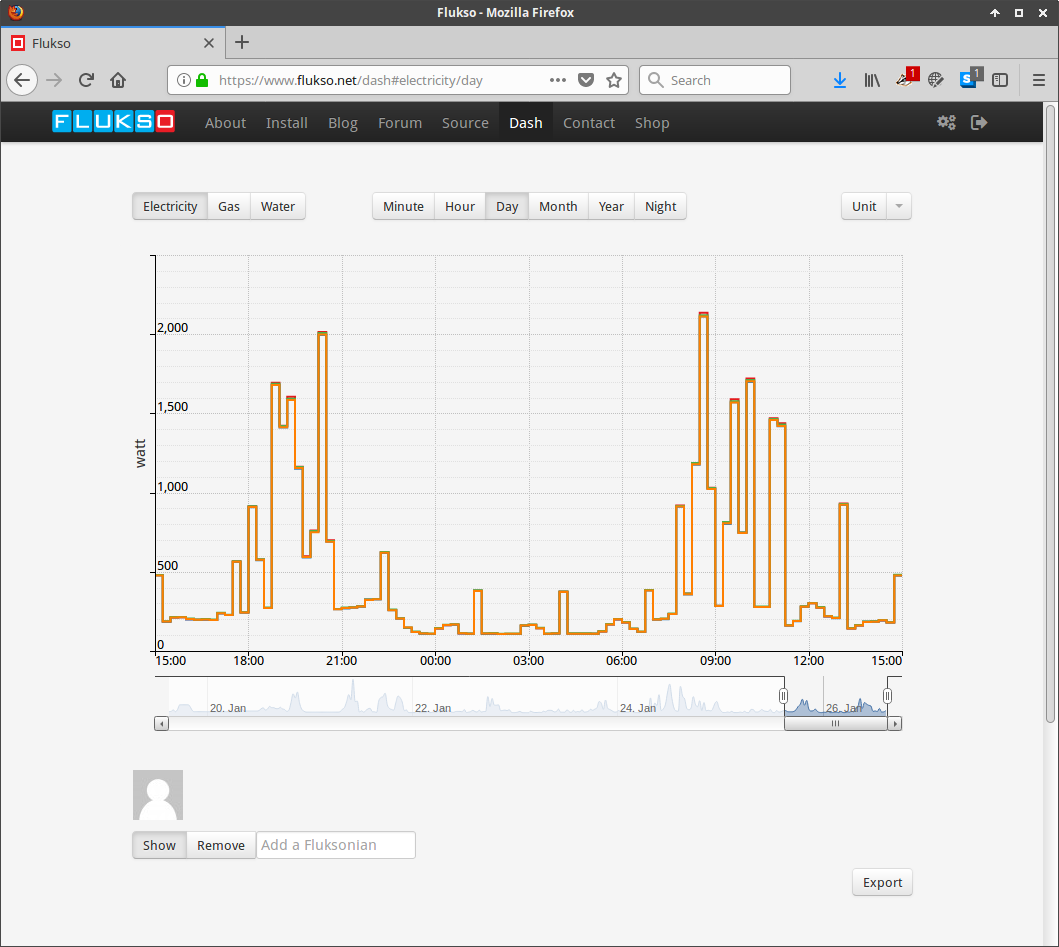
A first reading will be visible on the dashboard within five minutes.